
What is cPanel?
In this tutorial, we are going to learn about how to upload websites using cPanel and how to create an FTP account in cPanel. In simple language, cPanel is a control panel where you can manage every element of your web hosting account. It is easy to use. cPanel graphical interface makes it especially natural for accessing your files, websites, databases, email, and more! You'll also found the manageable module Softaculous giving you the facility to install the most popular software to your account with just one click. Use Softaculous to auto-install software like WordPress, Joomla, or Drupal to your account.
What is the FTP Account?
FTP stands for (File Transfer Protocol) FTP account is used for uploading and managing files on your website. An FTP account is automatically created in cPanel when you sign up for hosting. You can create different accounts to give access to other users by creating their accounts and giving different levels of access by assigning to the users a specific directory.
How to upload a website using cPanel.
Please follow the following steps below to uploading your website using the cPanel.
Step 1:
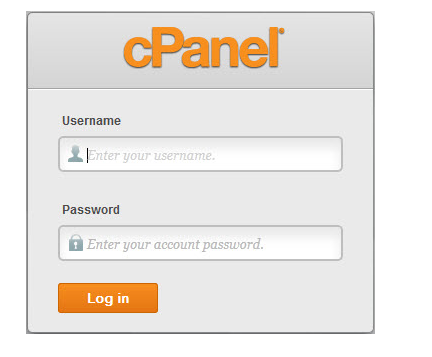
Login to your cPanel account using (https://[[IP Address]]:2083,) OR (https://[example.com]]:2083,) by replacing the IP address or example.com with your actual address that your service provider provides you. After entering the actual address in the google search bar you will be redirected to the login page looks like as shown below.

Step 2:
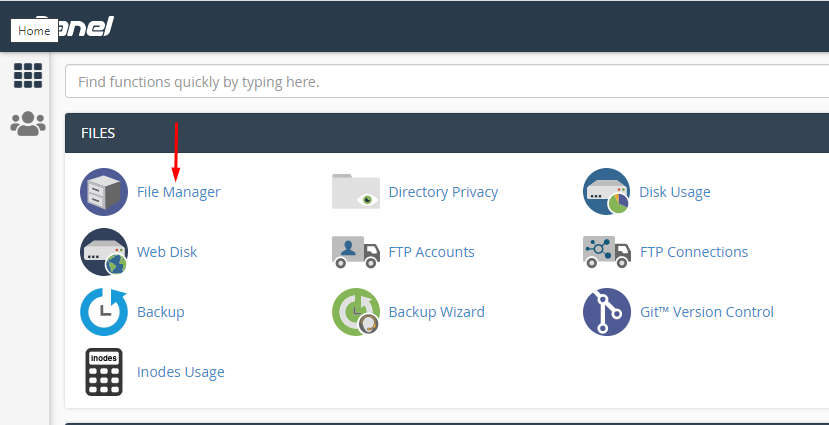
Enter your cPanel username and password after successful login you will be redirected to your Cpanel dashboard page looks like as shown below.
Step 3:
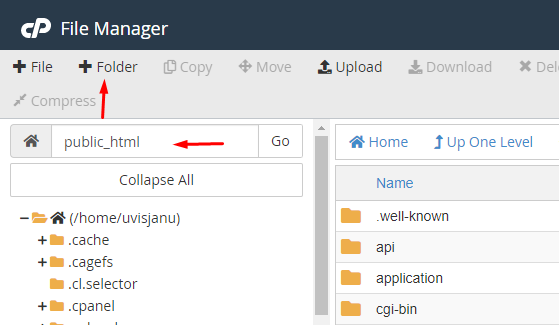
Now in the files section click on the file manager icon you will be redirected to the new page looks like as shown below enter (Public_html) and click on the “Go” Button Now create a new directory where you want your site to live by clicking the (+Folder) sign.
Step 4:
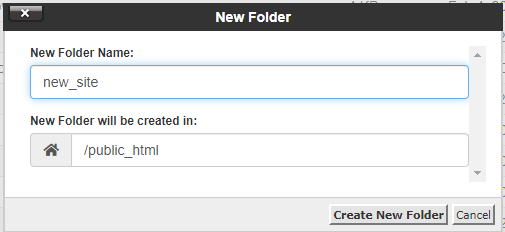
Now enter your folder name, Make sure that it’s inside “public_html” else your site won’t be accessible to anyone and click on create new folder button your new folder will be created.
Step 5:
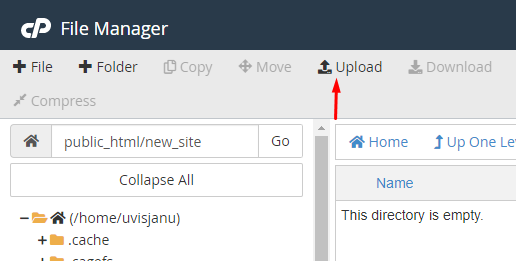
Now double click on the new folder that you have created and enter into it and click on (upload) button as shown in the below image.
Step 6:
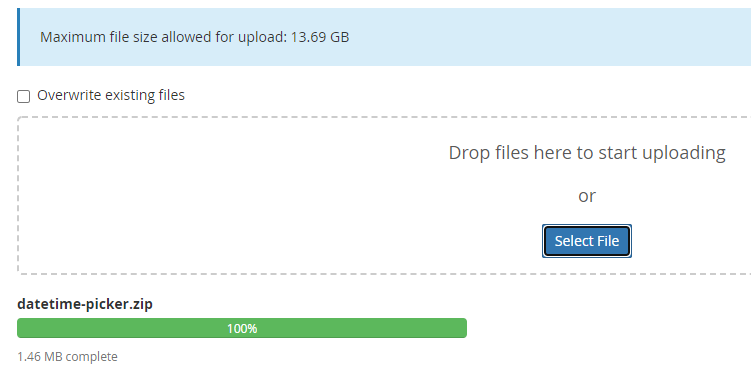
After clicking on the (upload) button you will be redirected to a new window with a (select file) Button click on this button and select file that you want to upload make sure this file is compressed zip file. It will take a while to depend on your file size.
Step 7:
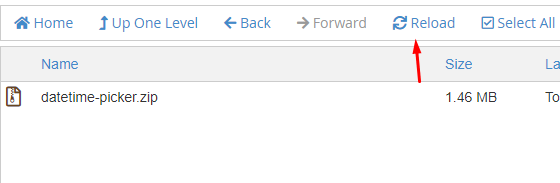
Wait until the progress bar has finished uploading, after uploading you can click to go back. If your uploaded file not appeared in the folder Just click the blue (Reload) link at the top and your compressed file will now appear.
Step 8:
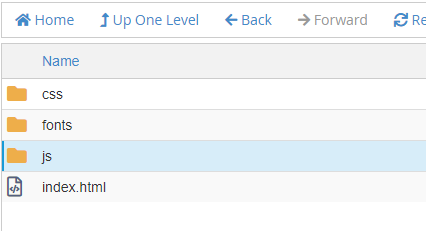
Right-click on the compressed file and click on extract after clicking the extract it will show you the files that you have compressed and upload.
Now you can access your website by entering your site URL in the google search bar. We hope you may learn how to upload a website using cPanel. Now we are going to learn how to create an FTP account using cPanel.
How to create an FTP account using cPanel.
Now we are going to create an FTP account. What is the purpose of creating an FTP account we have to learn this in the second paragraph of this tutorial? So let’s start.
Step1:
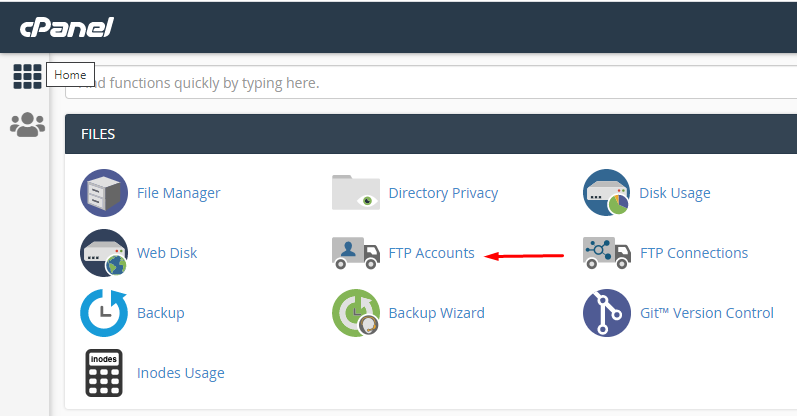
Login to your cPanel account as we already discuss this in step 1 and step 2 then click on FTP accounts Icon.
Step2:
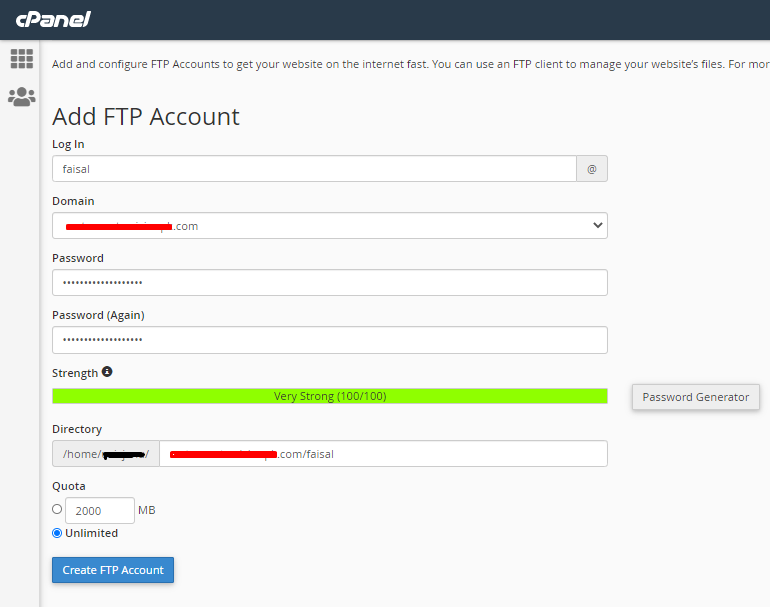
After clicking on the FTP Accounts icon you will be redirected to the new page looks like as shown below.
Step3:
In the Login field, enter the name of the FTP user as display in the above image. You cannot create an FTP account without your domain name in it, you can create domain easily.
- Go to the Domains sections.
- Click on the Domains icon.
- Then enter the Domain name (any)
- Click on the create button your domain will be created.
Step4:
In the Password fields, enter a password that will be used to confirm this FTP account and then confirm password.
Step5:
Now set a proportion for the FTP account. Proportion is the maximum amount of bandwidth the FTP user may use. If you leave the Proportion as unlimited, the FTP user will have the ability to use the total amount of bandwidth for the cPanel account.
Step6:
In the Directory field, cPanel will auto-populate an artificial directory based on the FTP username, but that is generally incorrect. So, we recommend erasing everything after public_html/ and providing the directory you would like the user to access in the above image Faisal is the directory.
According to the above image when we connect via FTP we will be “login” in Faisal directory which will act as the root directory for our connection. However, they will be able to access all files and subfolders inside that directory. If you erase everything and type a single "/", the user will have access to your home directory (anything outside of the public_html folder).
Step7:
Click on the create FTP account button after clicking on this button your FTP account will be created now you can manage your website files Using FTP.
Other related posts.
How to install WordPress using Cpanel
How to install WordPress on localhost or window
What is the model View and controller (MVC) architecture?
We hope you may learn how to upload websites using cPanel and how to create an FTP account in Cpanel. Please share your thoughts and queries in the contact section.