
What is Google Recaptcha and how to integrate it?
We are going to learn about PHP login logout with google Recaptcha using bootstrap and MySQL. Google Recaptcha is designed to protect your website from spams and abuse. If you have a website with a login form and you want to protect it from spams and abuses? Then we have a solution for you. It is a service provided by google to avoid spammers and attacks to your website.
In this tutorial I am going to show you how to integrate google recaptcha into your website.
To apply google recaptcha I am doing following Steps.
STEPS
We need to follow the following steps below.
Create directory.
Example image for directory.
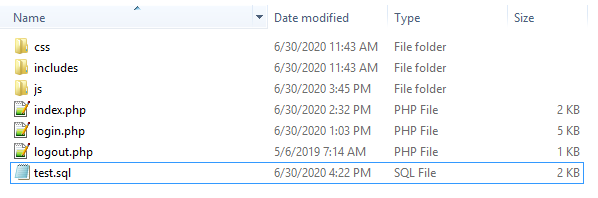
It is a good practice to create the required folders on your computer so you can proceed and mange it easily.
- CSS folder for custom styling and bootstrap library to make login form beautiful.
- Js folder for jQuery and bootstrap libraries.
- Includes folder has the database connection file with name conn.php.
- Test.sql file for importing the data into database.
Once you have created the required folders it is time to create your HTML structure for login form.
- Launch your text editor and create a new file and save it as "index.php" in your main folder.
- Create a new file and save it as "style.css" in your CSS folder.
- Create a new file and save it as "conn.php" in your includes folder.
- Create two more new files (login.php) and (logout.php) save that files in your main folder where you have save index.php file.
Create Database.
Open your phpMyAdmin and create a database with name (test) and import a sql file in it. You can download sql file from here. Click me to download sql file
If you import sql file in database than you need to use the below username and password into login form.
Username: imtiaz
Password: imtiaz
Create Database connection.
Open your conn.php file that you have save in includes folder and write a below code for database connection and save it.
<?php

$con=mysqli_connect("localhost","root","","test");

?>
Now we are going to create login form with google recaptcha first you will need to register your website on ReCaptcha's website .
Register your site.

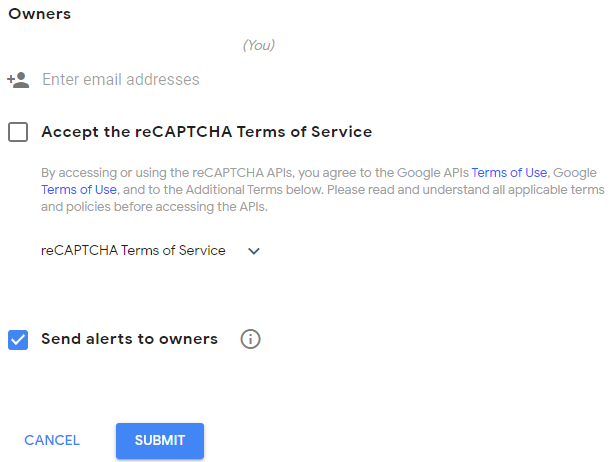
- See the above images and open the above recaptcha link and register your site by Typing in lable section (test.com)
- Select recaptcha type you want to use. recaptcha v2 has recognized to be more successful and accepted by the developer community so select (recaptchav2).
- And in domain field add the domain you want to have recaptcha. We will put in this field (localhost).
- Add your email address in email fields.
- Accept the recaptcha terms and coditions. And click on the register button.
After clicking on register button you’ll be redirected to a new page showing your site key and secret key.
New page look like as shown below.
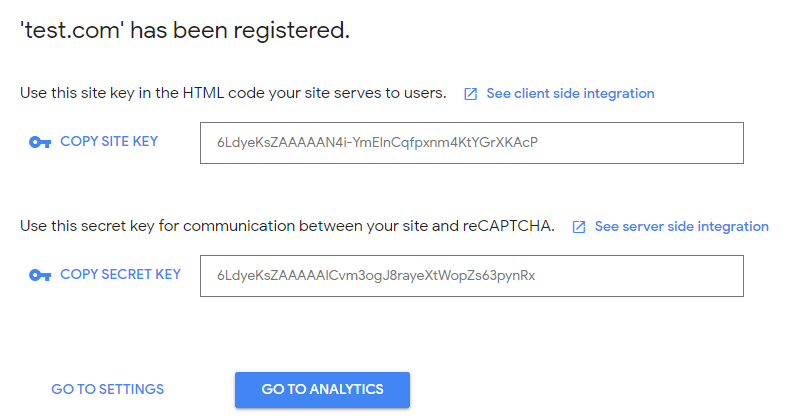
Copy them and save in any text file we will need them in login form and in php script.
To initialize the recaptcha on the page you need add the below script in head section.
<script src='https://www.google.com/recaptcha/api.js' async defer></script>Add the below div in your Login form where you want display the google recaptcha.
<div class="g-recaptcha" data-sitekey="6LcH3MEUAAAAAMIoCmcCr71XY_uEEsXqMcMISYTQ"></div>Remember:
Replace the data-sitekey attribute with your Site key that you have generate by registering the website and save in text file.
Now we are going to create Login form (in login.php page) using bootstrap libraries and by adding the recaptcha api script in <head> section and google recaptcha div in form section.
<!DOCTYPE html>
<html lang="en">
<head>
<title>Login Form With Google Recaptcha</title>
<!-- google recaptcha api script-->
<script src='https://www.google.com/recaptcha/api.js' async defer></script>
    <meta charset="utf-8">
    <meta http-equiv="X-UA-Compatible" content="IE=edge">
    <meta name="viewport" content="width=device-width, initial-scale=1">
<link href="css/bootstrap.min.css" rel="stylesheet" id="bootstrap-css">
<link href='css/style.css' rel='stylesheet' type='text/css'>


</head>
<body>
    <div id="login">
        <h3 class="text-center text-white pt-5">Login form</h3>
        <div class="container">
            <div id="login-row" class="row justify-content-center align-items-center">
                <div id="login-column" class="col-md-6">
                    <div id="login-box" class="col-md-12">
                        <form id="login-form" class="form" action="" method="post">
                            <h3 class="text-center text-info">Login</h3>
							<?php echo $msg; ?>
                            <div class="form-group">
                                <label for="username" class="text-info">Username:</label><br>
                                <input type="text" name="username" id="username" class="form-control">
                            </div>
                            <div class="form-group">
                                <label for="password" class="text-info">Password:</label><br>
                                <input type="password" name="password" id="password" class="form-control">
                            </div>
							<!-- google recaptcha div replace your data-sitekey -->
							<div class="g-recaptcha" data-sitekey="6LcH3MEUAAAAAMIoCmcCr71XY_uEEsXqMcMISYTQ"></div>
                            <div class="form-group">
								<label for="remember-me" class="text-info"><span>Remember me</span> <span><input id="remember-me" name="remember-me" type="checkbox"></span></label><br>
                                <input type="submit" name="submit" class="btn btn-info btn-md" value="LOGIN">
                            </div>
							<div id="register-link" class="text-right">
                                <a href="#" class="text-info">Register here</a>
                            </div>
                        </form>
                    </div>
                </div>
            </div>
        </div>
    </div>
	<script src="js/bootstrap.min.js"></script>
<script src="js/jquery.min.js"></script>
</body>
</html>
You can download the above bootstrap and jQuery libraries that we use to make login form beautiful by clicking the below links. By clicking on the links you will be redirect to the new page. So copy the all code and save them in their folders by creating the files and give name to the file.
https://maxcdn.bootstrapcdn.com/bootstrap/4.1.1/css/bootstrap.min.css
https://maxcdn.bootstrapcdn.com/bootstrap/4.1.1/js/bootstrap.min.js
https://cdnjs.cloudflare.com/ajax/libs/jquery/3.2.1/jquery.min.js
Now we apply some custom CSS to beautify the login form.
body {
  margin: 0;
  padding: 0;
  background-color: #17a2b8;
  height: 100vh;
}
#login .container #login-row #login-column #login-box {
  margin-top: 0px;
  max-width: 600px;
  height: 465px;
  border: 1px solid #9C9C9C;
  background-color: #EAEAEA;
}
#login .container #login-row #login-column #login-box #login-form {
  padding: 20px;
}
#login .container #login-row #login-column #login-box #login-form #register-link {
  margin-top: -85px;
}
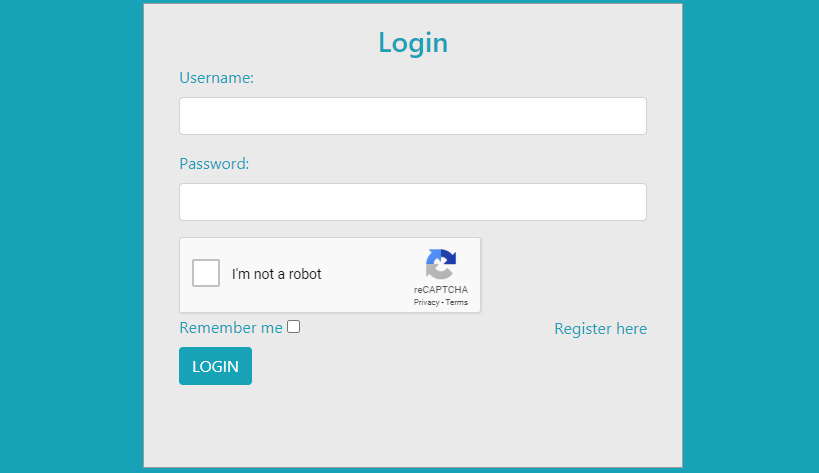
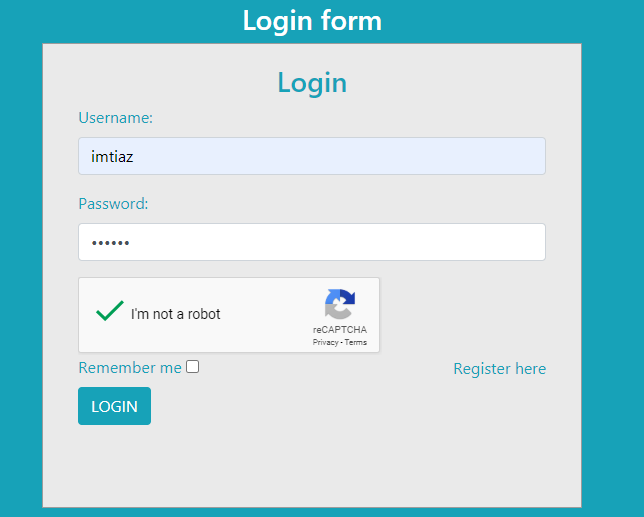
Your login form will look like as shown below.
Now we are going to create a PHP script and we add our secret key in this script in the same page login.php but before opening <html> tag.
<?php
session_start();
include "includes/conn.php";
if(isset($_SESSION['adminId'])){
//if password and username is correct than you redirect to index.php page.
	header("location:index.php");
}
$msg="";
if(isset($_POST['submit'])){ //for submission of form
	$username=mysqli_real_escape_string($con,$_POST['username']);//prevent sql injection
	$password=mysqli_real_escape_string($con,$_POST['password']);
		if(!isset($_POST['g-recaptcha-response'])){
          $msg= '<h2>Please check the the captcha form.</h2>';
          // exit;
			// die("unvalid");
		}
		else{
			$captcha=$_POST['g-recaptcha-response'];
			//you need to replace below secret key with your secret key
			$secretKey = "6LcH3MEUAAAAAIPNqLXo_vC6tQJKqnFypTj8aie_";
			$ip = $_SERVER['REMOTE_ADDR'];
			// post request to server
			$url = 'https://www.google.com/recaptcha/api/siteverify?secret=' . urlencode($secretKey) .  '&response=' . urlencode($captcha);
			$response = file_get_contents($url);
			$responseKeys = json_decode($response,true);
			// should return JSON with success as true
			if($responseKeys["success"]) {


					$query=mysqli_query($con,"select * from admin where username='$username'");//for running sql query
				if(mysqli_affected_rows($con)>0){
					$row=mysqli_fetch_array($query);//fetch data from admin table
					if(password_verify($password,$row['password'])){
						$_SESSION['adminId']=$row['id'];
						header("location:index.php");//for redirection
					}
					else{
							$msg= "<div class='alert alert-danger'>wrong password.</div>";

					}

				}
				else{
					$msg= "<div class='alert alert-danger'>wrong username</div>";

				}
					// echo '<h2>Thanks for posting comment</h2>';
			} else {

					$msg= "<div class='alert alert-danger'>Please check recaptcha box</div>";
			}
		}


}
?>
Now open index.php page and write the below code in it. After successfully login you will be redirect to this page.
<?php
session_start();
include "includes/conn.php";
if(!isset($_SESSION['adminId'])){
header("location:login.php");
}
?>
<html>
<head>
<title>Welcome</title>
</head>
<style>
#map{
height: 400px;
left:10px;
margin-right:490px;
}
h1 {
background-color: aquamarine;
}
</style>
<body>
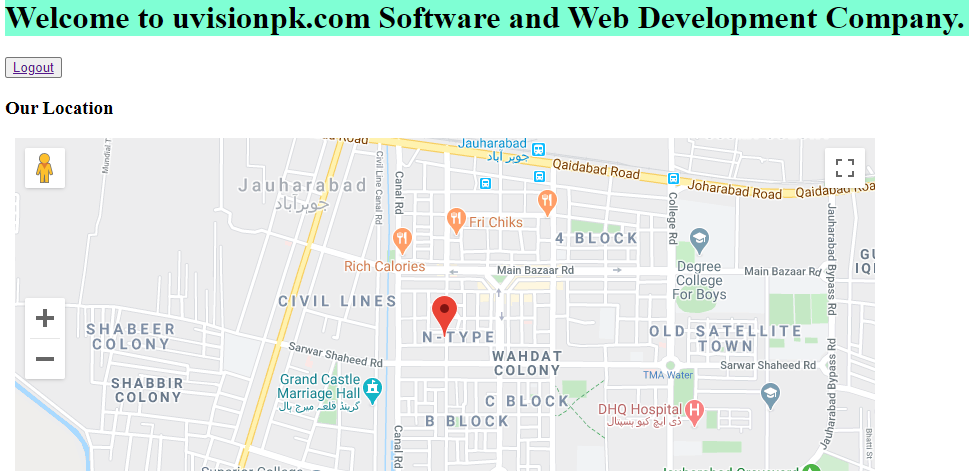
<h1>Welcome to uvisionpk.com Software and Web Development Company.</h1>
<button><a href="logout.php" class="btn btn-success"><i class="fa fa-sign-out"></i> Logout</a></button>
<div class="location"><h3>Our Location</h3> </div>
<div id="map"></div>
<script async defer src="https://maps.googleapis.com/maps/api/js?key=AIzaSyDUQqnwmyXZ2DgtqHIYSocbIiyG9e4s5ZA&libraries=geometry,places&callback=initMap" type="text/javascript"></script>
<script>
var map;
function initMap() {
map = new google.maps.Map(document.getElementById('map'), {
center: {lat: 32.2847121, lng: 72.2780179}, // lat/long of center of map
zoom: 15, // 8 or 9 is typical zoom
scrollwheel: false, // prevent mouse scroll from zooming map.
mapTypeControl: true, //default
mapTypeControlOptions: {
style: google.maps.MapTypeControlStyle.HORIZONTAL_BAR,
position: google.maps.ControlPosition.BOTTOM_CENTER
},
zoomControl: true, //default
zoomControlOptions: {
position: google.maps.ControlPosition.LEFT_CENTER
},
streetViewControl: true, //default
streetViewControlOptions: {
position: google.maps.ControlPosition.LEFT_TOP
},
fullscreenControl: true
});
var marker = new google.maps.Marker({
position: {lat: 32.2847121, lng: 72.2780179}, // lat/long of marker
map: map,
animation: google.maps.Animation.DROP, // drops marker in from top
});
};// end initMap function
</script>
</body>
</html>
Your index.php page look like as shown below.
Now open your (logout.php) and write the below PHP code in it for logout from the index.php page.
<?php

session_start();

unset($_SESSION['adminId']);

header("location:login.php");

?>
Other Related Posts
How to Import CSV File data into MySQL Database
How to Import Excel File Data into MySQL Database
How to integrate DataTable in HTML Table with Example
DataTable Server Side Processing using PHP and MySQL
We have all done here is the final output of Login form with google Recaptcha using bootstrap PHPand MySQL.
Final Output Image.
We hope you may learn how to create login, logout system with google recaptcha using bootstrap and PHP. Please share your thoughts and queries in the contact section.
Below is the Download link of above tutorial.
Click here to download full source code