
What is slider?
In this article, we are going to learn how to generate a custom slider to display a slideshow of images on web page using HTML, CSS, JQuery and javascript. We no need any plugin to create custom slider we just need the knowledge about HTML, CSS, and JQuery.
We can used slider on all kind of websites. sliders are commonly used on business or professional websites. Site holders can place all their essential content in an attractive slideshow at the top of the page before their main content. So users can see the best part of website and take action.
Let's start making a simple and custom slider.
You can build your slider using HTML CSS and jQuery if slider requirement are simple you can achieve it.I will attempt my best to cover this in a straightforward way so you can understand it and apply custom slider in any of website.
Here is an example of custom slider.

STEPS
We need to follow the following steps below to create custom slider;
Create directory for custom slider.
Example image for directory
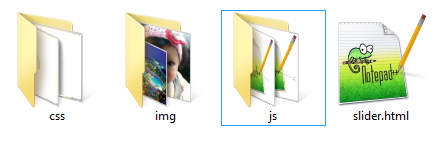
It is a good practice to create the required folders on your computer so you can proceed and mange it easily.
Main folder with slider name.
Images folder where all the images that you need for your slider should be stored.
CSS folder for the styling of slider.
Js folder for the jQuery script of sliders.
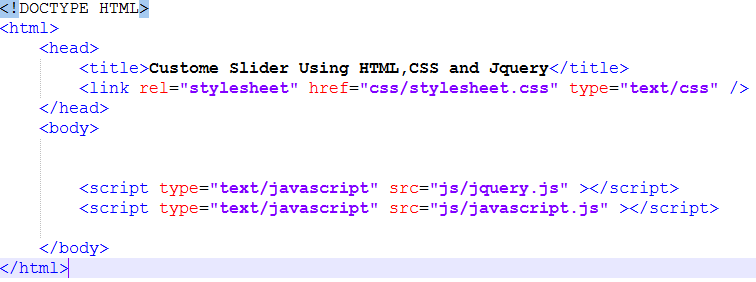
Once you have created the required folders it is time to create your HTML structure for slider.
- Launch your text editor and create a new file and save it as "slider.html" in your slider folder.
- Create a new file and save it as "stylesheet.css" in your css folder folder.
- Create a one more new file and save it as "javascript.js" in your js folder. and images you have already stored in your images folder.
- Write down the standard HTML5 tags used in defining a HTML document in "slider.html" file by adding link of stylesheet.css in head section and scripts(javascript.js) in body section before closing body tag.
Example image of HTML code setup;
After writing the standard html tags and adding the link and script we make a structure of slider in body section between body tags.
Here is a complete HTML structure of slider.
   <!DOCTYPE HTML>
<html>
	<head>
		<title>Custome Slider Using HTML,CSS and Jquery</title>
		<!-- below link is css stylesheet link-->
		<link rel="stylesheet" href="css/stylesheet.css" type="text/css" />
	</head>
	<body>
	<!--start wrapper-->
		<div id="wrapper" class="sliderr">
			<ul id="images">
				<!--images that we store in our images folder-->
				<li><img src="images/c.jpg" /></li>
				<li><img src="images/d.jpg" /></li>
				<li><img src="images/e.jpg" /></li>
				<li><img src="images/g.jpg" /></li>
				<!--end images-->
			</ul>
			<ul id="bullets">
			<!--bullets for slider-->
				<li></li>
				<li></li>
				<li></li>
				<li></li>

			</ul>
			<!--right and left errows sign-->
			<a href="#" class="next2"><img src="images/right.png" /></a>
			<a href="#" class="Previous2"><img src="images/left.png" /></a>
			<!-- end right and left errows sign-->
		</div>
		<!--jquery library to run the javascript code-->
		<script type="text/javascript" src="js/jquery.js" ></script>
		<!--link of javascript file where we write javascript code-->
		<script type="text/javascript" src="js/javascript.js" ></script>

	</body>
</html>
As you can see there is a slider structure Inside a <div class="wrapper"> element which will be fixed width and center. Now let's add a little CSS for slider:
Here is a complete CSS style code of slider.
/* style for wrapper*/
#wrapper{
	margin:0 auto;
	width:600px;
	height:500px;
	position:relative;
}
/*end wrapper style*/
/*start images style*/
#images{
	margin:0 auto;
}
#images li{
	list-style:none;
}
#images li img{
	width: 600px;
    height: 600px;
    position: absolute;
	display:none;
    top: 0;
    object-fit: contain;
}
/*end images style*/
/*start bullets style*/
#bullets {
   margin: 0 auto;
    position: absolute;
    bottom: 8px;
    left: 228px;
}
#bullets li {
    float: left;
    cursor: pointer;
    margin-left: 14px;
    list-style: none;
    background-color: yellow;
    border-radius: 11px;
    width: 15px;
    height: 15px;
}
ul#bullets li.active{
    background-color: orange;
}
/*end bullets style*/
/*start erros style*/
.next2 img {
    float: right;
    position: absolute;
    right: -59px;
    top: 272px;
}
.Previous2 img {
    float: left;
    position: absolute;
    left: 18px;
    top: 268px;
}
/*end erros style*/
Now we are going to write a javascript code in our javascript file that we have already create in our js folder that will handle the slider operation.
Below is the javascript code to handle the slider operation.
$(document).ready(function(){
	$('#images li img').hide().first().show();//for hide and show images
	$('.sliderr #bullets li').removeClass("active").first().addClass("active");//add and remove class for bullets
	var index=0;
	var lastEle=$("#bullets li").length-1;
	//function for next image
	$(document).on("click",".next2",function(){
		if(index==lastEle){
			index=0;
		}
		else{
			index+=1;
		}
		slider(index);

	});
	//function for previous image
	$(document).on("click",".Previous2",function(){
		if(index==0){
			index=lastEle;
		}
		else{
			index-=1;
		}
		slider(index);

	});
	//function for bullets on click event
	$(document).on("click","#bullets li",function(){
		index=$(this).index();
		slider(index);

	});
	//function for images interval
	var setTiming=setInterval(function(){
		if(index==lastEle){
			index=0;
		}
		else{
			index+=1;
		}
		slider(index);

	},1500);
	//reset timimg
	function resetTim(){
		clearInterval(setTiming);
	}
});
function slider(i){

	$('#images li img').hide(900).eq(i).show(300);
	$('.sliderr #bullets li').removeClass("active").eq(i).addClass("active");

}
Here is the final output result after adding CSS and jQuery (javascript code) that we have done. Now let's run the HTML page in the browser and see the output. The slider should work properly.
Final Output of Custom Slider

We hope you may learn how to create a custom slider. Please share your thoughts and queries in our contact section.
Below is the Download link of custom slider.
Click here to download full source code