
What will you learn in this totrial?
- You will learn about SweetAlert JavaScript library
- You will learn how to setup SweetAlert library on your website
- You will learn how to create beautiful alerts using SweetAlert library
Required Skills.
- Basic HTML and CSS knowledge is required
- Basic JavaScript knowledge is required
- You need a Text Editor, web browser and internet connection to download some resources.
Introduction
SweetAlert is an open source project javascript library that allows designers to replace default javascript alert with a more advanced and beautiful one. SweetALert makes popups and modals messages look pretty and easy to use even for beginners.
For this tutorial, we’re going to setup a simple webpage to show the work of SweetAlert JavaScript library while also showing the default JS alert alongside it. We’ll create two buttons, one will demonstrate SweetAlert and the other one Defualt JS alert.
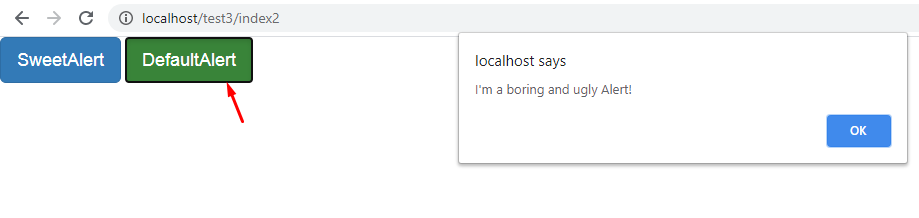
Default alert image
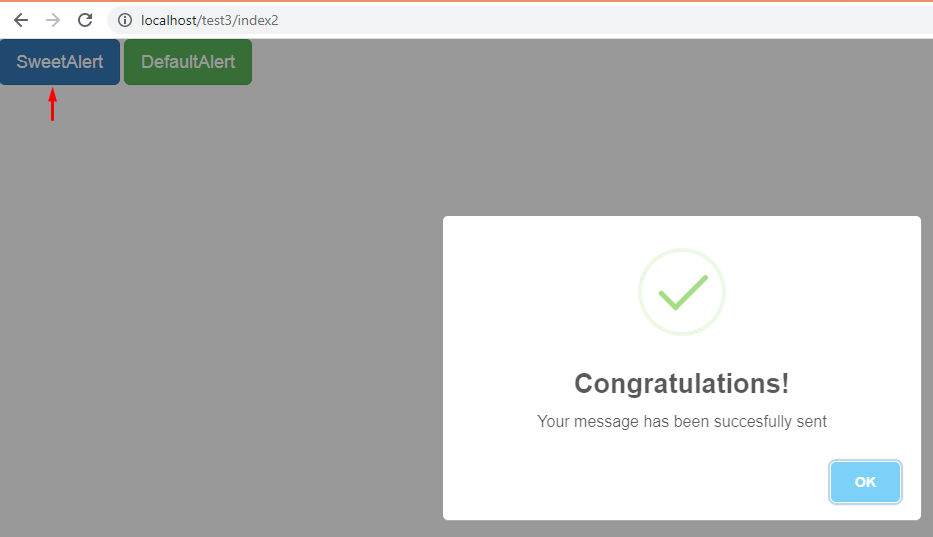
Sweetalert image
STEPS
Setup web page
We need to follow the following steps below to create our web page;
- Launch your text editor and create a new file and save it as "index.html" in your development folder.
- Write down the standard HTML5 tags used in defining a HTML document in "index.html" file. Example;
<html>

  <head>

    <title>Beautiful and sweet alerts using SweetAlert</title>

  </head>

<body>


</body>

</html>
In order to integrate SweetAlert.JS into our page. We have to download the library from the official repo here once downloaded, you can include the JavaScript and css files with the usual scripts and links element as you would do for any other JavaScript and css libraryies:
<link href=" path/to/bootstrap.min.css" rel="stylesheet">

<link href=" path/to/sweetalert.css" rel="stylesheet">

<script type="text/javascript" src=" path/to/jquery.js"></script>

<script type="text/javascript" src=" path/to/bootstrap.min.js"></script>

<script type="text/javascript" src=" path/to/sweetalert.js"></script>
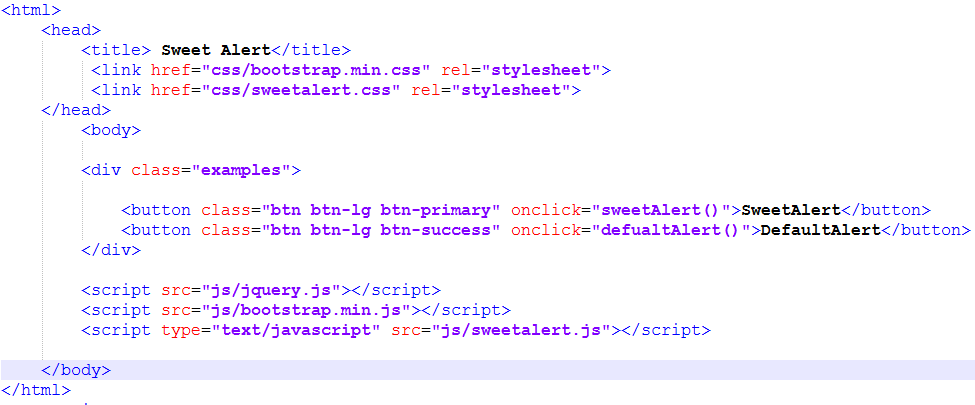
Code setup image
Setup SweetAlert.JS:
- Locate the
<body>section in "index.html" and create two buttons withonclickattribute like the one below. The classes are that of bootstrap.
<button class="btn btn-lg btn-primary" onclick="sweetAlert()">SweetAlert</button>

<button class="btn btn-lg btn-success" onclick="defualtAlert()">DefaultAlert</button>
write down the following code to initiate SweetAlert between <script> before closing </body> tag
function defualtAlert() {

      alert("I'm a boring and ugly Alert!");

    }
Preview in browser
Screenshot below shows the default JS Alert after clicking the green button.
Preview in browser
Screenshot below shows the sweetalert after clicking the green button.
These are just some of the options and methods we can use in SweetAlert library. You can check the official documentation for more.
Source code
Here is a full source code of this tutorial.
<html>

            <head>

                        <title>Beautiful and sweet alerts using SweetAlert</title>

                         <link href="css/bootstrap.min.css" rel="stylesheet">

                         <link href="css/sweetalert.css" rel="stylesheet">

            </head>

            <body>


            <div class="examples">


        <button class="btn btn-lg btn-primary" onclick="sweetAlert()">SweetAlert</button>

                        <button class="btn btn-lg btn-success" onclick="defualtAlert()">DefaultAlert</button>

      </div>


            <script src="js/jquery.js"></script>

            <script src="js/bootstrap.min.js"></script>

            <script type="text/javascript" src="js/sweetalert.js"></script>


            <script>


                        function defualtAlert() {

      alert("I'm a boring and ugly Alert!");

    }

            function sweetAlert() {

            swal('Congratulations!', 'Your message has been succesfully sent', 'success');

            }

            </script>

            </body>

</html>
We hope you may learn how to use Sweetalert. Please share your thoughts in the comment section below.